Showing posts with label Tutorial. Show all posts

Saturday, September 8, 2012

D.I.Y: Printed Onesie

Hey guys!

   So I thought I would share with you a neat little project that I did today. I screen printed on a onesie, but not really because I used a stencil I made out of contact paper rather then a silk screen. Anyways lets get started!!!

   Alright so the supplies you will need include:

  • Scissors
  • Tape
  • Exacto Knife
  • Cutting Board 
  • or if you have one of those neat Cricut machines you can skip the above supplies
  • Contact paper
  • Screen Printing Ink ( I used yudu, Lavender, because it was on sale at Michaels) 
  • Onesie or Shirt
  • Cardboard
  • and a squeegee type piece of plastic (mine came with my screen printing stuff,) it is really just a thin piece of plastic with a straight edge

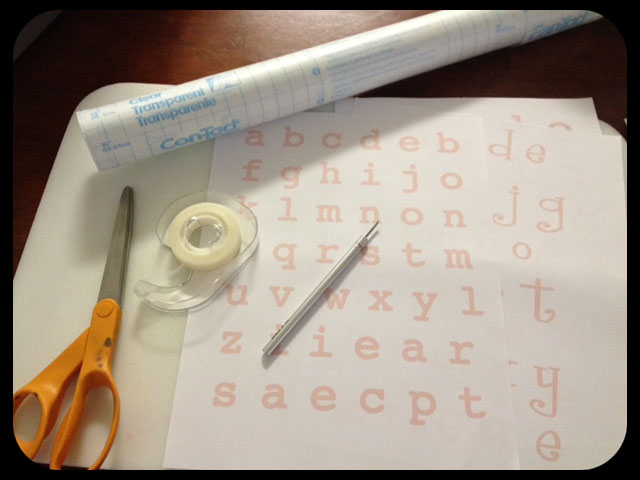
   So first I printed some letters to make the stencil. Then I taped the contact paper and the printed paper to my cutting board so that they would not move while I exacto knifed those letters :)


   Very carefully I traced the letters with the exacto knife and cut each one out. Now the important part of the letter to keep clean is the outside. (Not the part that is sticking out in the picture below)


See clean cut :)


   Now if you have one of those cool cutting machines then you don't have to do the above steps, and this is the part where I really envy you because cutting each letter out takes a while. Especially if you want to make them look pretty. Okay then you take apart the contact paper and place your letters on the onesie. 


Then put a few drops of your paint on the onesie...
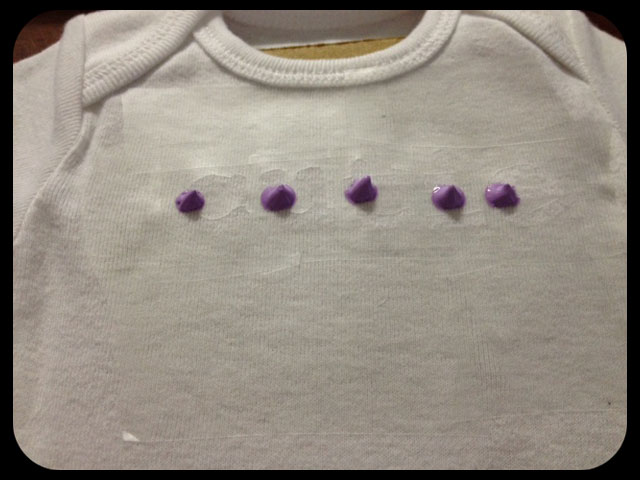

and squeegee away!


   Last leave the stencil on for an extra minute after you have administered the paint. This lets it dry abit so that it does not bleed once the stencil is off. Be very careful when pulling the contact paper off. 

Let it dry for like an hour or so and then place a towel over the image and use an iron to set the image.

And Tada!!


I also made this onesie:

This one was much easier to make because I did not have to make teenie tiny cuts for letter. 


Friday, August 24, 2012

Quick Organization: My desk

Hi guys!

    I hope you all are having a lovely week! This past week has been pretty busy here. My Mom just moved into a new house so we have been unpacking and organizing and unpacking some more. I thought I would show you how I organized the desk in my room :) I had a few crafty thing supplies laying around in bags that I finally put away.


  • So the top left photo shows my scrap fabrics and thread neatly placed in a vintage lunch box that Mr.Cherry bought for our first dating anniversary. I needed a container to put them in and found it very useful.  On the top right is said lunch box when it is closed. 


  • The bottom left photo is my make shift ribbon rack thing. I used a #2 pencil and two pieces of ribbon to make it. Very simple. Tie each end with the ribbon and tack it to where ever you feel like displaying your ribbon rolls. I also used hot glue to secure the ribbon on the pencil after I tied it just for the extra sturdiness. 


  • The bottom right is a photo of my glue stick holder. Yes you can just use a cup, but I ran out of cups to use on my desk and still needed a place to put them. I did have an empty water bottle laying around and thought "hey I could use this!" So I got my scissors and cut across the middle of the bottle. Then I was like "Dude this looks tacky!" So I grabbed a piece of scrap fabric and wrapped it around the bottle. I glued it in three spots: 1. The length of the yellow line. 2. Around the bottom edge 3. The top inside. (I then folded the fabric over so that it would be secure, this eliminated the sharp edges.) Pretty simple :) 

If this didn't make any sense to you just let me know ;)

   My finished desk:


Yay for being organized! I hope it last :D

Saturday, May 26, 2012

No Sew DIY Tank Top

    Wooohoooo! It is summer time. The air is hot, the BBQ pit is lit (ok not really) and the river is waiting. Tomorrow I am headed out to float the river and I am so excited! BUT, I don't want to go out in my swimsuit because I feel like I am in that stage of pregnancy where I look fat and not pregnant; so I decided to make a cover up thing. 

   So first I got one of my Dad's T-shirts:


   Then I cut the sleeves  and the collar off (I actually cut the collar several times after I was done until I was satisfied with how it looked.)


   Then I cut the sleeves into to three strips each ( I forgot to take pictures.) Next you are going to use a bottle of some sort to help you braid three of the strips together. 


Then you take one of the braids and loop it through the sleeves like so:

Keith says HI!

   And tie a knot. 
Turn it around so the knot is on the inside and TADA:


Pretty right?
At this point I tried it on several times and cut the collar as I saw fit.  I also tied each strap with a bit of left over t-shirt to make the sleeves thinner. 


And last I cut the bottom rim of the t-shirt so that it would be flowy. 

Here is the front:


And the back:


  I can't wait to wear it! I will post pictures of this top in action later! Cheers!

Saturday, March 24, 2012

Cleaning Day

So today I am doing some casual cleaning around the house, yesterday I did the kitchen and today it is laundry and the floors. Well the floors, gosh I hate them. They get so dirty so quick and these two don't help the matter at all.

   But as I was saying. So I was cleaning the floors. I swept everything up and was ready to swiffer wet jet my floors to a new kind of clean. Thats when I realized I was all out of the Swiffer "solution." Then I remembered something I saw on Pinterest about being able to take the caps off of the Wet Jet bottles, so I did some investigating and I found an amazing Instructable on how to take it off! Here is the Link!!! 
If you don't want to click on to another site though I can give you a run through. First get your wet jet bottle, a pot of boiling water and some nail clippers. Next put the bottle in the boiling water, cap side down. After a minute or so the plastic gets soft enough for you to twist that sucker right off. But please be warned it is hot. Now inside the cap are these little rivet things that prevented you from taking the cap off in the first place. Clip those of with the nail clipper or a razor or just something sharp, K! And Tada!!! You have a refillable bottle that you can put whichever solution floats your boat, or cleans your floors :) 


  Amazing right! Now you don't have to spend extra money on buying another WetJet bottle!
                    Cheers!